In the previous blog I thought through a Stakeholder map and the most important personas. Knowing who will primarily use the tool, it is now time to think through what their use cases should look like – it is time to map the user journey.
In this blog, I explain my approach of this tools user journey as well as a first mock-up of the tool.
User Journey Mapping
A user journey is a timeline of user actions. It’s a visualization of all a user’s interactions from their point of view. „User journey mapping“ describes the process of creating a timeline of all touch points between a user and a organization, including all channels they happen in. (cf. [https://www.appcues.com])
Such a journey can simply be created using post-its. There will usually be one main timeline, however, the user might strife off the main path. It is therefore also important to think through alternative steps a user might do.
My user journey consists of four major parts. The first part is the Unity phase, as shown in Figure 1. The developer starts his environment, works on some feature, algorithm or mechanism until the most important milestones of the day are completed. After closing the environment and maybe uploading his changes into some cloudservice for collaborative purposes, the developer starts a newly built game and plays to a point where the AI should start its training soon.

The second part is the settings phase, as shown in Figure 2. In this phase, the developer starts the tool and sets up everything. The first thing after starting is some configuration, which might be necessary especially when the program is started for the first time. These configuration steps are undefined at this point, but might include AI hyperparameters or language settings. Next, the developer has to provide some essential information for the training process, including a company and project name of the game that is to be tested (the names are needed to find score information in the registry), a list of inputs (buttons the AI will press during testing) and the opened game itself. These settings are automatically saved and may be used later.
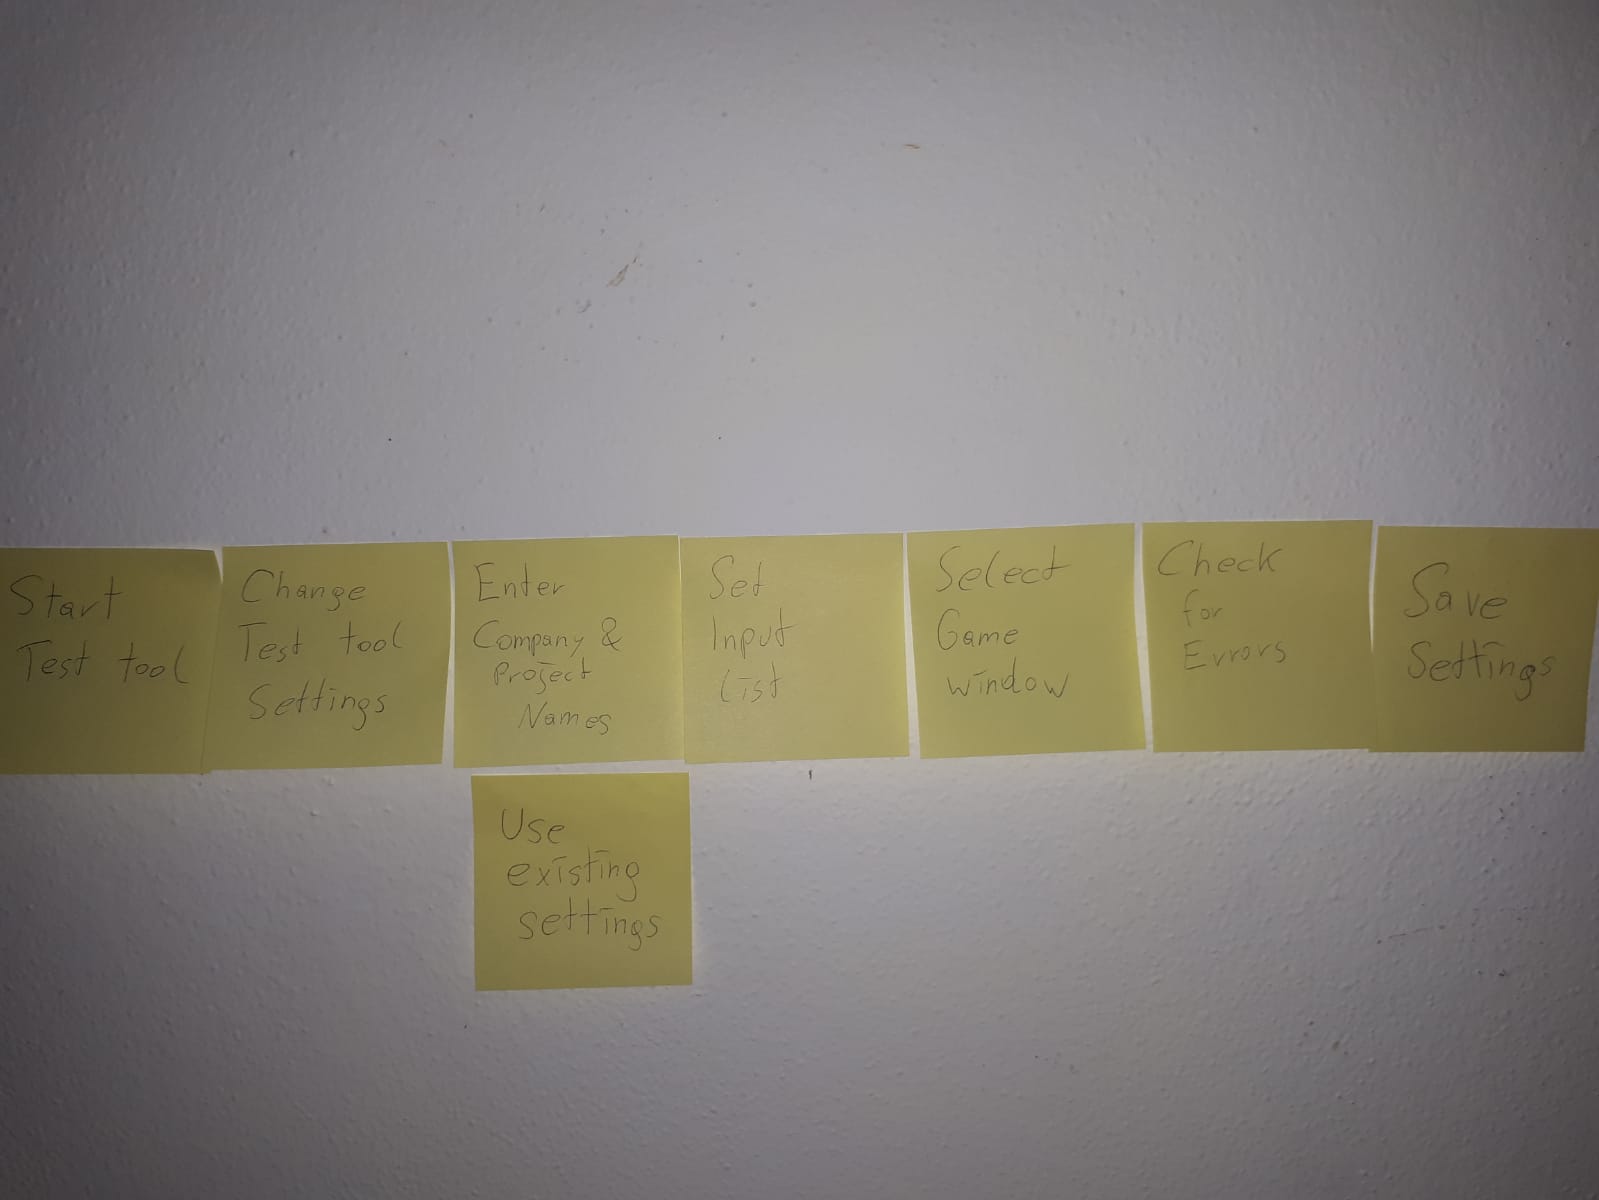
The third part is the testing phase, as shown in Figure 3. This phase is very streaightforward: the developer initiates the testing processes, lets it run and checks the results. Alternatively, the process can be prematurely cancelled by pressing some pre-configured button. Cancelling also leads to some results.

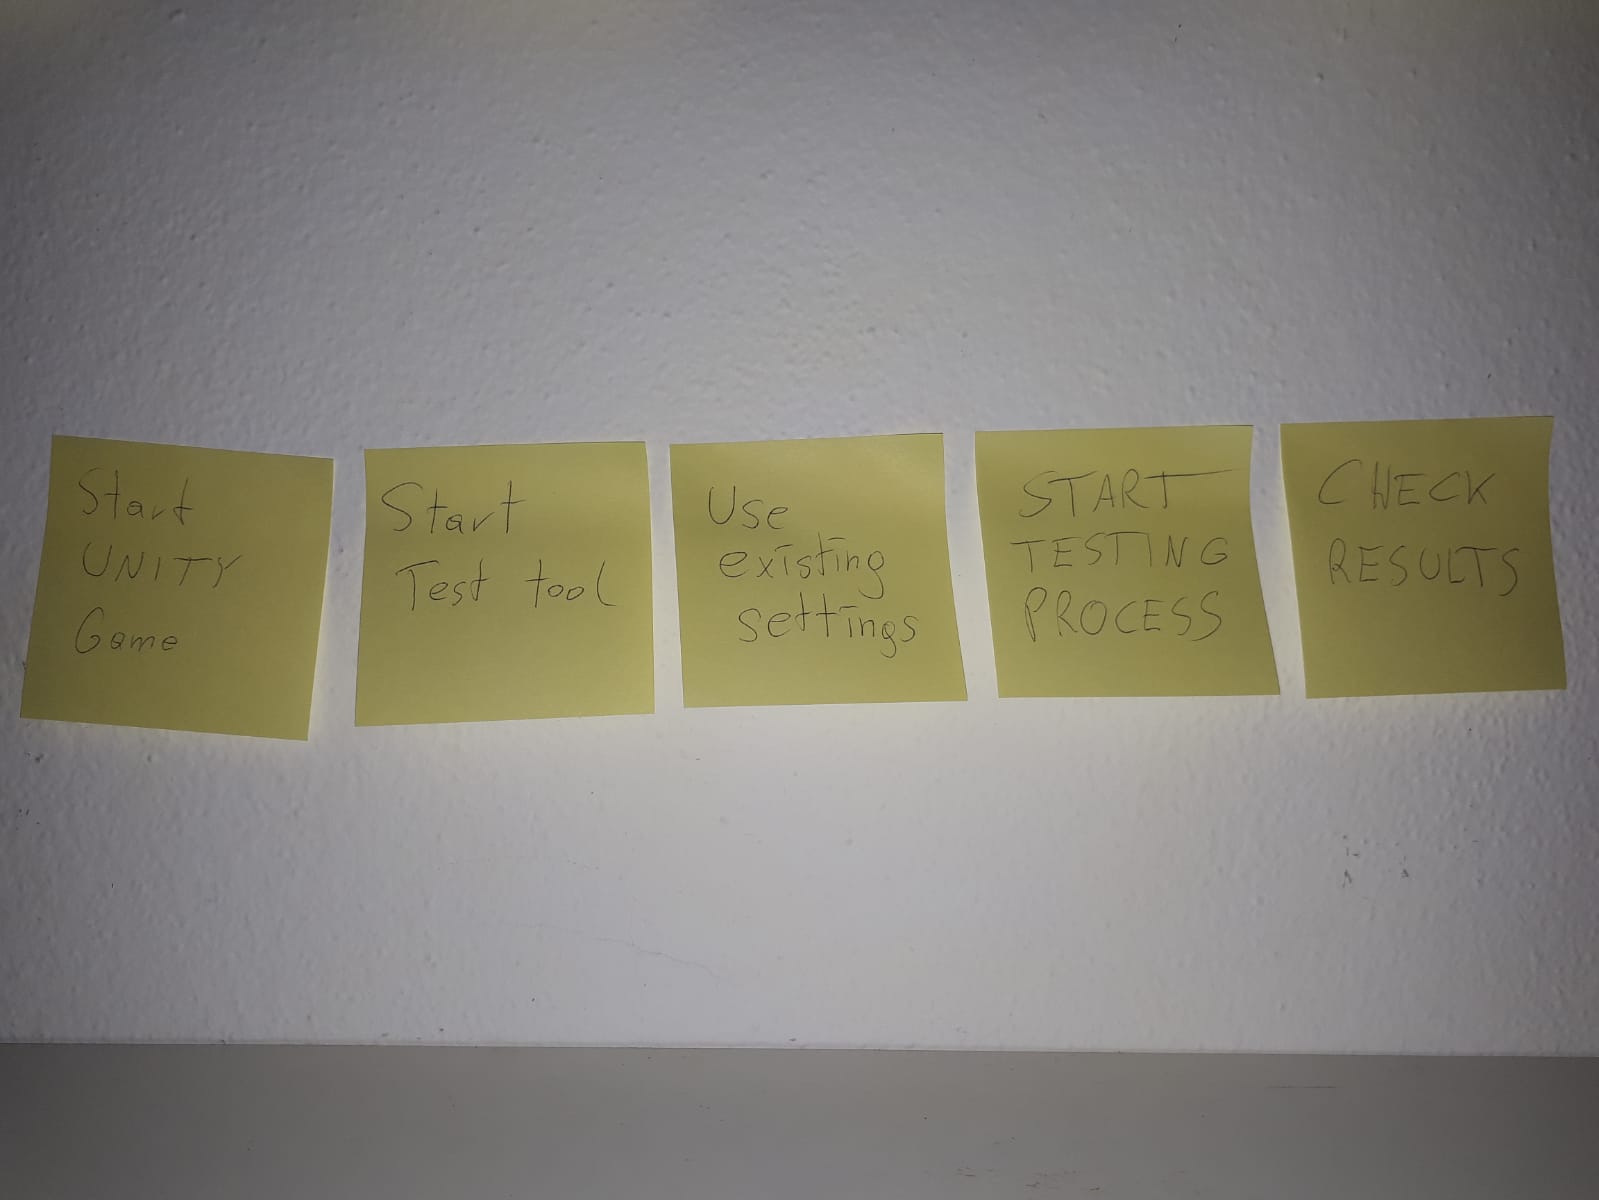
The fourth part of the User Journey Map is the MVP – the Minimum Viable Product. This is the part of the whole timeline that may not be skipped. The most important steps in the timeline, as shown in Figure 4. Developers do not necessarily have to implement new features, they can simply start an existing game. They can also test the whole game instead of individual scenes, thus simply starting the game is enough. The testing tool needs to be started, it does not need to be configured though (assuming there are already existing settings). This makes the path to the testing phase very short. After the testing process has been started, developers can watch the AI and check their performace live.
Mockup
Think of it as a means of showing off what your design will actually look like when it’s put out into the real world.
A mockup is a model of a design or device, used to present some product. A mockup may be created using dedicated graphics software such as Adobe Illustrator or Photoshop – but sometimes using rather basic tools might be better. (cf. [https://design.tutsplus.com])
I used the online service Moqups to create a mockup of my tool pictured in Figure 5. Although it is a intuitive and fast tool for the purpose, most of the services functionality is unavailable unless a registered account is used, which is fine but annoying.
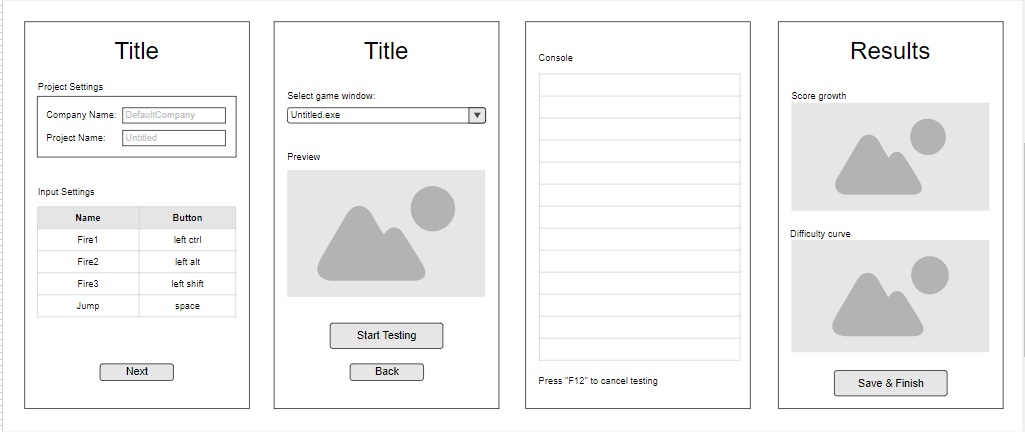
While creating the mockup I forgot about some important configuration settings. However, I do not plan to include them in the main pages of the tool since it might overwhelm the user. Therefore, I will add some „Advanced Settings“ tab in the final product.
Sources
[https://www.appcues.com]
Kaytes, Geordie: A beginner’s guide to user journey mapping. What is a user journey map? https://www.appcues.com/blog/user-journey-map (30/12/2019)
[https://design.tutsplus.com]
Stefan, Andrei: What Is a Mockup? 2018, https://design.tutsplus.com/tutorials/what-is-a-mockup–cms-32231 (30/12/2019)